CyberLit is a powerful lighting tool for Cyberpunk 2077, originally developed by Hatti and later improved on and extended by Otis_Inf. It allows players to add custom lights in-game, radically widening the possibility for all kinds of creative shots. This guide aims to demystify the wide array of available controls, so you can take your shots to the next level.
All the information presented in this guide has been inferred through observations and prior knowledge. As a result, some parts may be inaccurate or left unknown - there is a good chance they have negligible if any effects anyway.
Diagrams of how the lights work in this guide aren't wholly accurate. They look soft and slightly diffused since they were captured in-game, through the fog weather. More details as to how I did it below!
Operation
CyberLit is integrated into the camera tools for Cyberpunk 2077. Once IGCS has been injected into the game, the default keybind to open the CyberLit menu is F2. Upon clicking Create light, you'll be greeted by a long list of controls. There isn't much need to change anything right now, as you will likely be returning to edit your lights quite often.
Click Create at the bottom. You should see Light 1 added to the List of lights. Clicking Edit will open the list of controls again. Ctrl-clicking on a value will allow you to manually type one in.
Creating a light will spawn it right where your camera currently is, and will point in the same direction if it's a directional light like a spotlight.
Type
There are three types of lights available exposed by CyberLit, Point, Spot and Area. These are analogous to the same types of lights found in 3D programs like Blender or Autodesk Maya.
Point lights radiate light in all directions from a single point in 3D space. It's best used for environmental lighting due to its omnidirectionality.
Spot lights shoot a cone of light in a specified direction, also from a single point in 3D space. This is best used for lighting portraits, as it can be aimed at certain parts of a face.
Area lights are an extension of spotlights. Instead of originating at a single point in 3D space, the light emitted by an area light comes from the entire surface area of a 2D plane. Unfortunately, area lights in CyberLit don't appear to function the same as typical area lights in 3D programs. However, they still can produce some striking results when configured a certain way, as we'll explore later down below.
We'll cover most of the controls from here on using a default Spot light.
Position / orientation
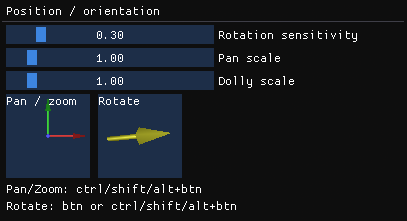
These are the position and orientation control gizmos, allowing you to adjust the light's position and rotation in the game world without needing to adjust with Stick light to camera.
The first three controls are sensitivity scales, to adjust the speed of the movement / rotation of the light.
To use the gizmos, you click and hold in the box and move your mouse around. If you don't notice anything happening, you may have Stick light to camera active. Holding down your modifier keys (ctrl / shift / alt) restricts the movement / rotation to an axis in local space, allowing for more precise adjustments to be made.
Color and light aspects
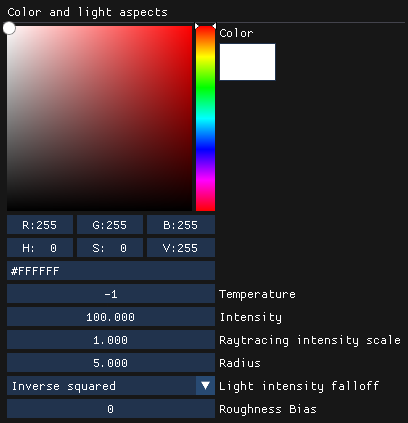
These are the general controls of your light, allowing you to tweak its color and how it interacts in the game world.
Color picker / RGB / HSV / Hex
A standard visual color picker is available for easily picking a color. The next three rows of controls are three different ways of specifying a color, the 8-bit RGB decimal triplet, Hue-Saturation-Value, or the 8-bit RGB hexadecimal triplet (hex).
Temperature
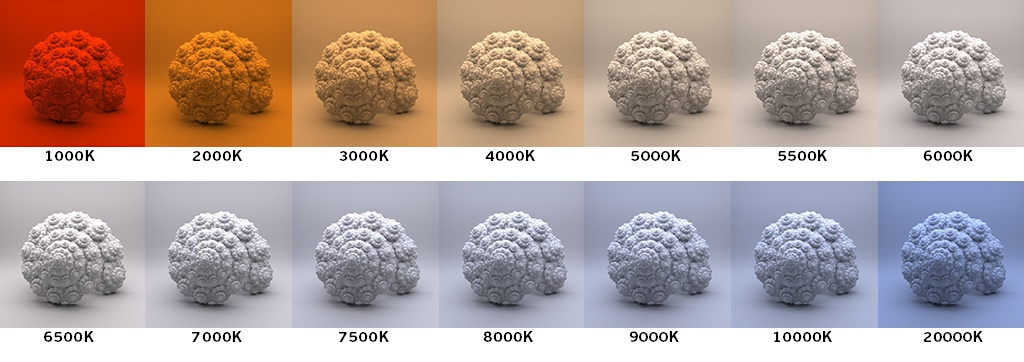
This adds to any set colors with a color that corresponds to the temperature of an ideal black-body radiator. In other words, you can set warm and cool lights with this. Represented in Kelvin, you can mimic sunlight, candlelight, and various other natural lights with this setting.
If you already have an RGB value set, this setting will modify that color. You need a fully white (255,255,255) light for the temperature values to act accurately.
Intensity
This controls how bright the light is.
Raytracing intensity scale
unknown, appears to modify Intensity
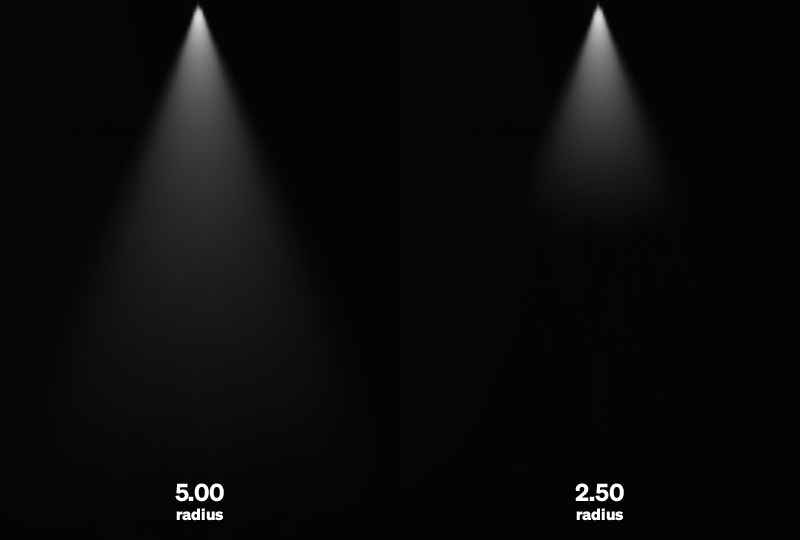
Radius
This controls how far the light can travel, likely in in-game meters.
Light intensity falloff
This controls the intensity falloff of the light. Setting this to Inverse-square mimics how light intensity would dim in the real world as it gets further from the source. Setting this to None maintains light intensity throughout the light radius.
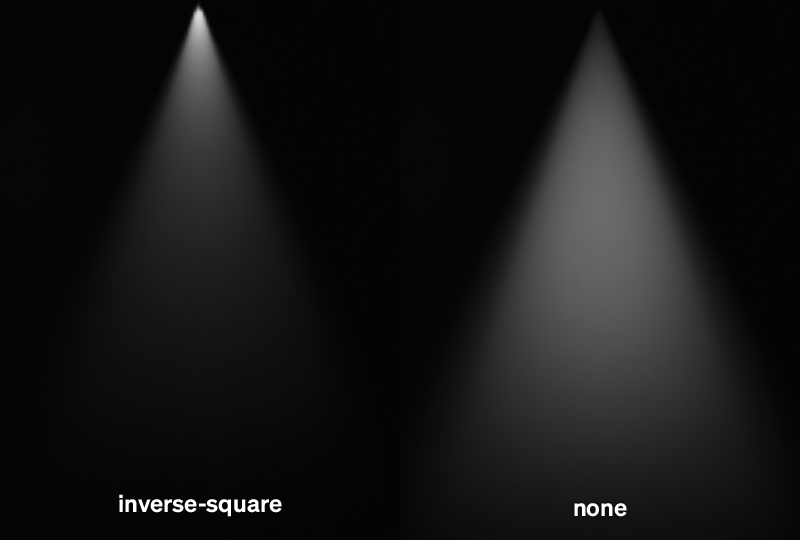
It can be useful to set this to None while moving lights around. Since there is no intensity falloff due to distance, your subject will stay lit at the same brightness as lights are moved further or nearer.
Roughness Bias
This overrides the roughness of the specular highlights produced by a light when shone on a surface. Values to 127 appear to make specular highlights rougher. A flip happens at 128, where specular highlights are now sharp and become more rough until they return to default at 255.

Spotlight settings
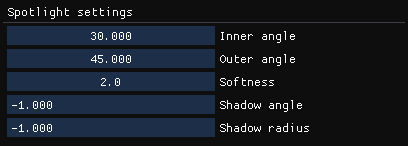
With the light type set to Spot, these controls are exposed, allowing the editing of how the light looks.
Examples in this section have Attenuation set to 1 for clearer illustrations.
Inner angle
This controls the softness of the light relative to the outer angle, in degrees. Anything within the inner cone will be evenly lit while the light gradually falls off closer to the outer cone. Setting inner angle to be equal or greater than outer angle creates a spotlight with hard edges.
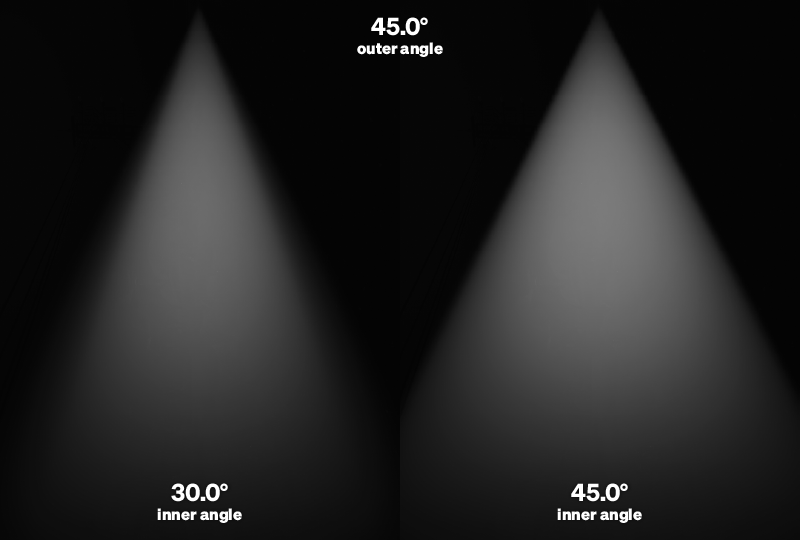
Note how the edges of the light are visibly harder towards the bottom when inner angle is equal to outer angle.
Outer angle
This controls how wide the whole cone of light is, in degrees.
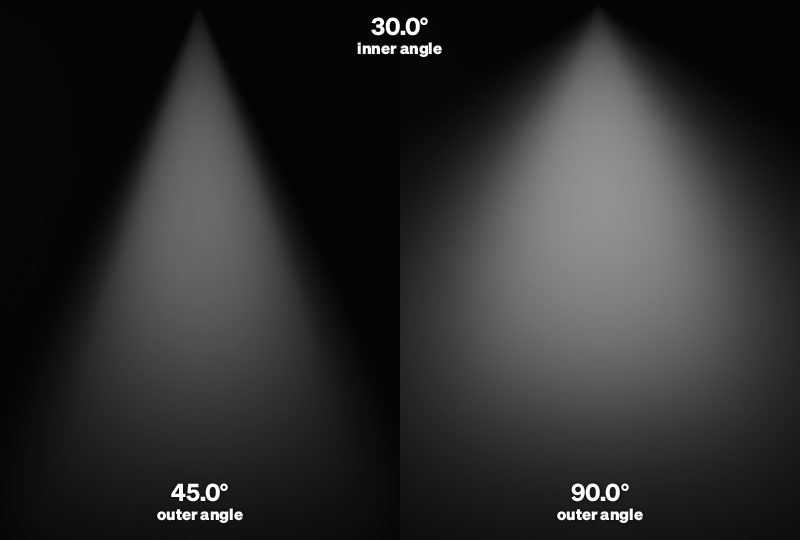
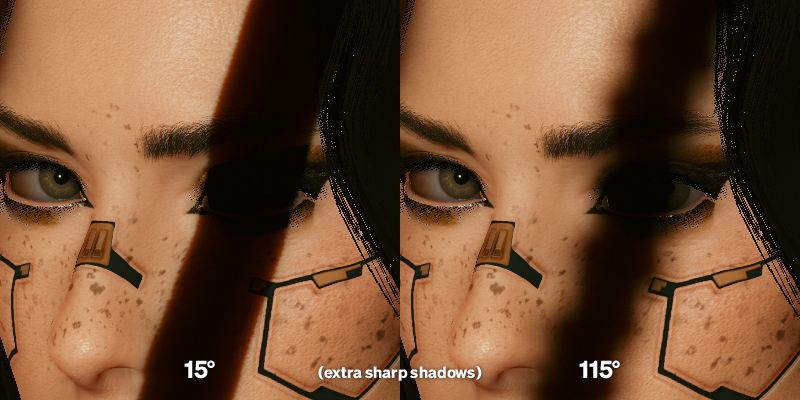
A larger outer angle will cast shadows over a larger region, however the shadow map remains the same resolution. An outer angle that's too large will result in pixelated shadows!
Softness
This 'modifies' the falloff gradient set by the inner & outer angle. Values closer to 0 shift the gradient to be harsher, while values past 2 further soften the light past the set inner angle. Setting softness to 0 produces a very similar hard-edged spotlight to the one produced by an 'inner angle = outer angle' spotlight.
Shadow angle & radius
Independent controls for fine-tuning shadow casting. Similar to light angle & radius above, except just for shadows. Can be buggy, best to leave at -1 (default values).
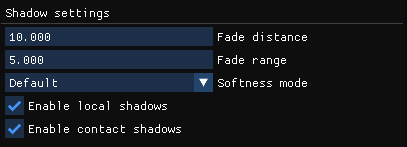
Shadow settings
Fade distance
This determines the render distance of your shadows. Increase this if your shadows start to disappear when you move too far.
Fade range
This appears to be a modifier of fade distance.
Softness mode
This determines how sharp / soft the edges of your shadows are. Can be useful when replicating a harsh camera flash or strong sunlight.

Enable local shadows
Enabling this lets your light cast local shadows using a shadow map. Only spotlights are capable of casting local shadows
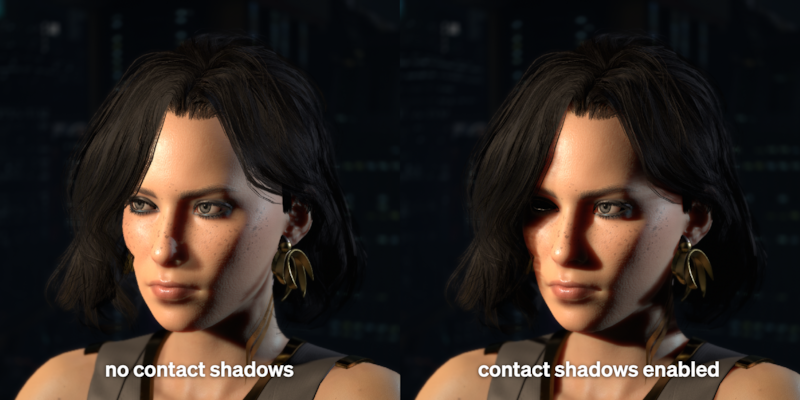
Use contact shadows
Enabling this lets your light cast screenspace shadows. Use this to have hair cast shadows.
Toggles
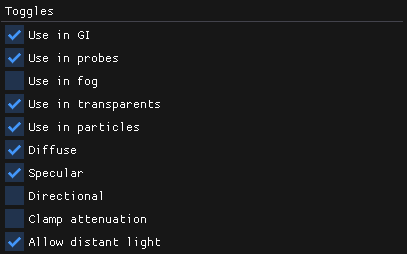
These checkboxes change how the light interacts with the rendering engine. For the most part, these can be left alone to achieve accurate lighting.
Use in GI / probes
The light will cause and contribute to bounced / reflected lighting.
Use in Fog
The light will have volumetric properties if the weather is foggy.
This setting is how I captured the comparisons above, as it allows me to showcase the lights as a volume, easily capturing their properties.
Use in transparents
The light will appropriately interact with transparent objects.
Use in particles
The light will appropriately interact with particles (smoke, etc.).
Diffuse / Specular
These control if the light contributes any surface lighting or specular highlights. Disabling diffuse for example creates a light that only shows up in reflections. This feature is currently bugged in-game (1.31), once unchecked you will not be able to re-enable them!
Directional
The light will be collimated, casting parallel shadows. This is useful when playing with shadows - a directional light casting parallel shadows will not change the size of the shadows based on its properties. This can mimic the incredibly distant nature of the sun as a light source.
Point lights do not work with Directional for obvious reasons. Area lights, even spotlight capsules (see below), do not work with Directional either.
This is also how the outer angle shadow resolution example was taken, having the light be directional meant that the size of the shadow wouldn't change as the cone of light got wider.
Clamp attenuation
unknown
Allow distant light
unknown
Using area lights
At default settings, area lights seem to act like point lights, emitting light in all directions. They do not cast shadows and are generally not too useful until a setting is enabled: Spotlight capsule
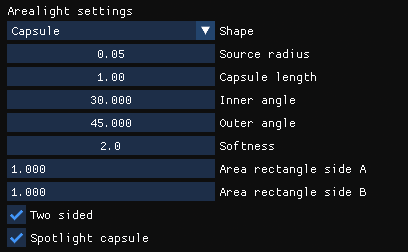
Enabling Spotlight capsule causes the area light to function akin to a spotlight, with a few other quite useful features. Spotlight capsules function as capsule-shaped lights that point in a specific direction. They're also able to cast shadows!
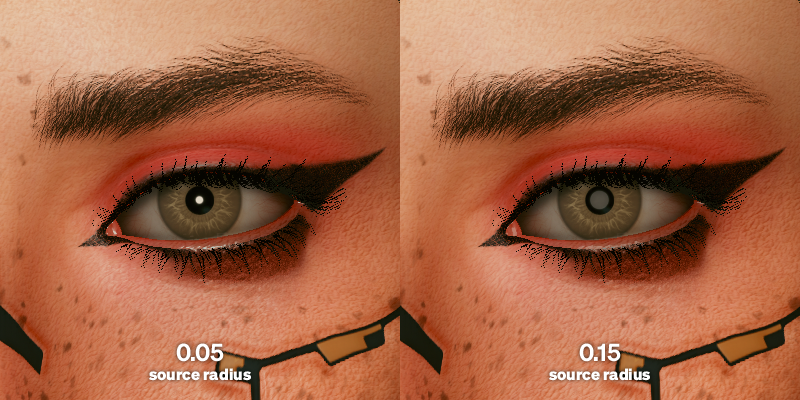
Source radius
This determines how large the light is physically in-game. This is different from the earlier Radius setting, which determines how far the light can cast. Generally, this affects the size of specular highlights.
Capsule length
This determines how long the capsule is. This affects both the shape of the casted light and its reflection. This also controls the size of the shadow map, reduce capsule length if your shadows are too pixelated.
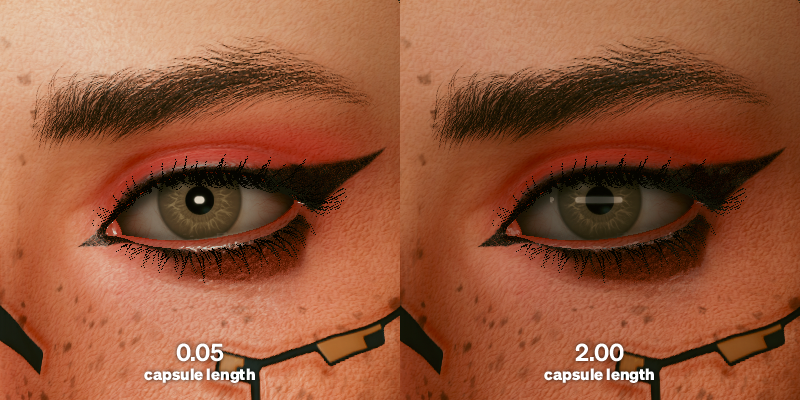
Do note the dropoff in light intensity!
Angles & Softness
These settings function identically to the spotlight settings above. However, by playing with the outer angle you can create strips of light when capsule length is long enough. This can be used to create some pretty neat effects, especially when outer angle is played with.
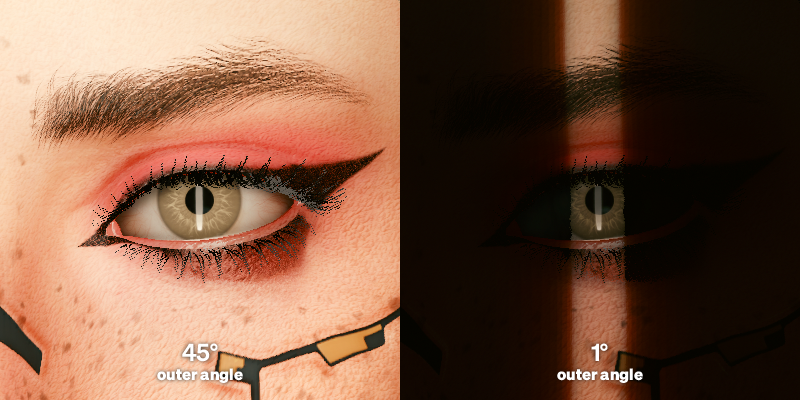
This was done using a long capsule light that's been rotated vertically with the orientation gizmo. Due to the incredibly small outer angle, inner angle is basically useless. The softness modifier helps to soften the edges of an otherwise quite harsh light strip. Also, note how the size of the light's reflection stays the same.
Area rectangle side A / B / Two sided
unknown
Other interesting effects
These are just some interesting experiments from messing with CyberLit. I hope you find a way to use them to their best!
Mixing colors
Colored lights mix in an additive manner!
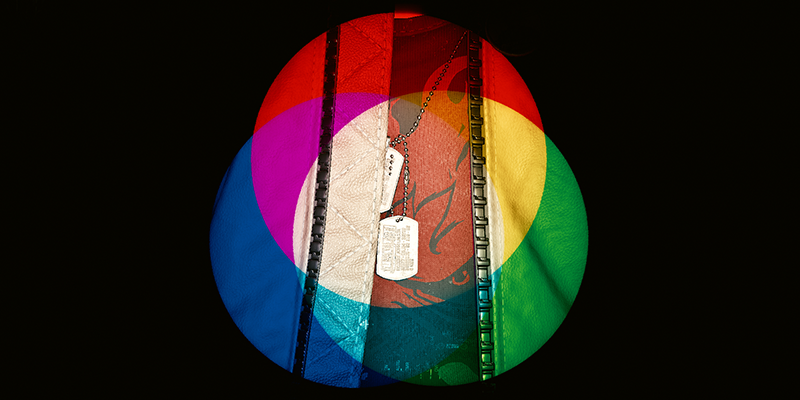
Three spotlights, of pure Red, Green and Blue.
This can be used to mimic the appearance of dispersed light, like I've done so in the header image. Red (255,0,0), Yellow (255,255,0), Cyan (0,255,255) and Blue (0,0,255) mix to form White. By offsetting these lights slightly from one another, it introduces this "chromatic abberation" to the light.
Enhanced eyelights
By disabling Diffuse in Toggles and placing an area spotlight capsule very close to an eye, you can further emphasise an eyelight, the reflection of a light source in an eye.
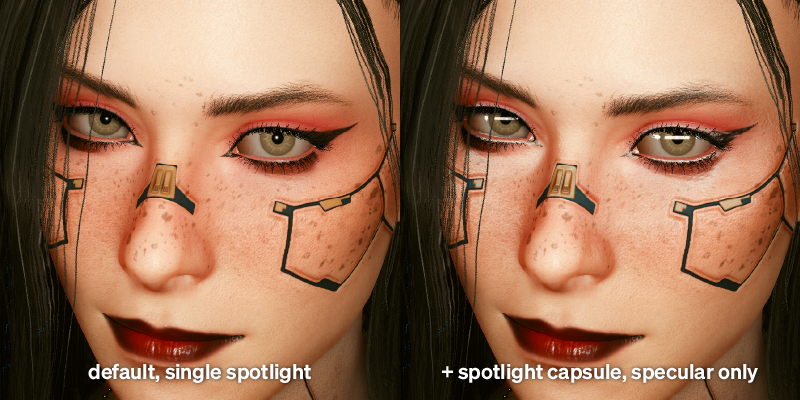
Note that this does add specular highlights to other areas as well, most obviously on her lower eyelids in the above. You can reduce this additional specularity by placing the light more strategically.
last updated 24th December 2021
written by moyevka
thanks to Dread for clarifying some settings
